Chapter 10 - The Lanes (Melody only)
The Melody Track is not one sequence but eight, layered on top of each other. Chapter 9 covers the screen you edit them on; this chapter is about the lanes themselves - what each one does, how their independent lengths interact, and the two sub-screens that still have a page of their own.
What you can sculpt - the 8 lanes
Each lane holds up to 32 steps of independent values.
| Lane | What it controls |
|---|---|
| PITCH | The pitch offset for each step, in scale degrees. This is your tune. |
| GATE | Note length. Supports Tie (extends the previous note across this step) and Slide (legato overlap into the next step) as special values. |
| VELOCITY | How loud each step plays. Supports Accent (full velocity) and Mute (silent step) as special values. |
| SLICE | Per-step subdivisions of your notes; chops, ratchets, trills and strums. |
| OCTAVE | 12 semitone pitch-shift per step. |
| CHANNEL | Per-step MIDI channel shift; play individual notes of the melody on different sounds/synths. |
| DELAY | Timing offset per step. Where micro-groove lives. |
| LAYERS | Number of layered notes per step. |
Button 2 on the melody screen selects which one you are looking at - tap for the next, or hold and turn the CONTROL Knob to scrub. Its label is the lane's name, so the button doubles as the indicator.
Every lane is always on. There is no enable switch: a lane you don't want contributing is one you clear (ADVANCED knob 8, or COMMON button 1 - hold CONTROL), which returns it to its flat baseline - no offset on any step.
Independent lengths, and SYNC
Each lane has its own length. You might set PITCH to 8, VELOCITY to 16 and GATE to 32. They all cycle at their own rate, coming back into phase every so often. This is one of the main ways to make an UNA sequence vary as it repeats.
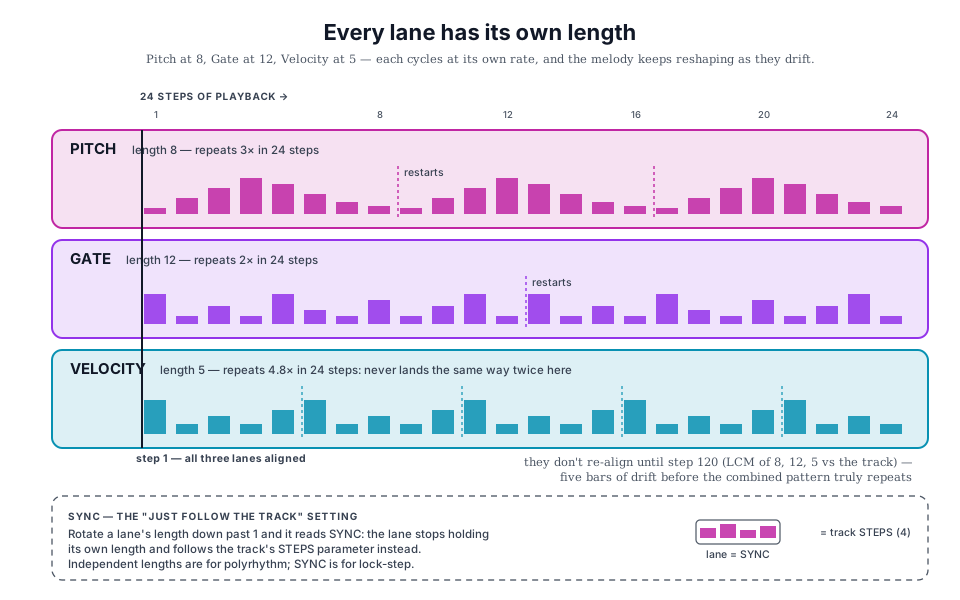
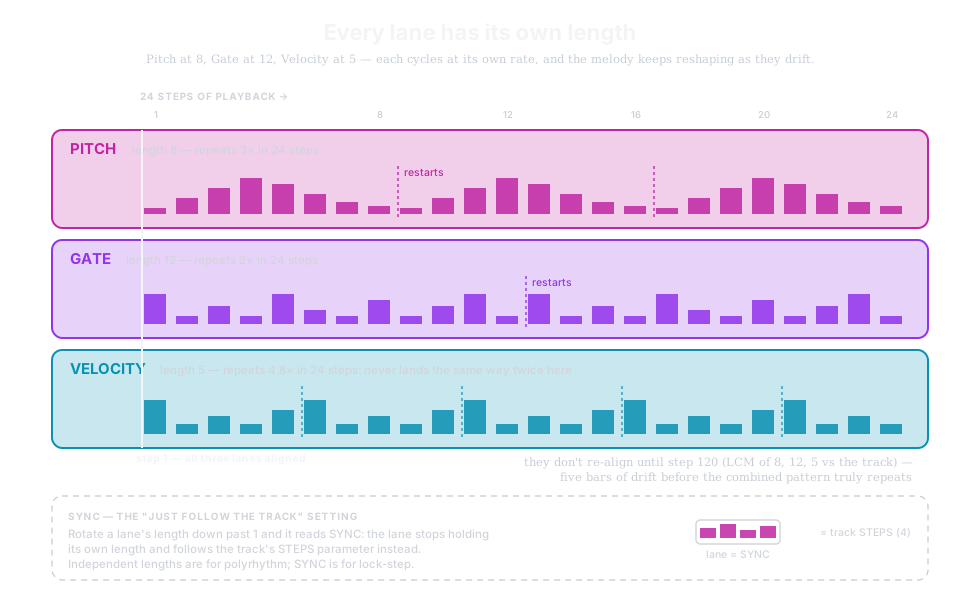
Set a lane's length with step - ADVANCED knob 2 on the melody screen. Turn that same knob to edit it; there is nothing to latch.
Turn the length down past 1 and the lane enters SYNC. In SYNC the lane stops holding its own length and follows the track's main STEPS parameter instead. Turn back up from SYNC and it takes an independent length again, starting at 1.
SYNC is the "just follow the track" setting; independent lengths are for polyrhythms and cross-cycling patterns. The length read-out along the top, under knob 2, tells you which you are on - a number, or the word SYNC.
Rotation (rot, ADVANCED knob 3) shifts the whole lane's values left or right within its own grid, rather than resizing it. Useful when a pattern you like starts on the wrong beat, or when you want to shift a lane against the others mid-performance. It is independent of the track's own ROTATE parameter.
Seeing both at once. The melody grid always draws the wider of the track's loop and the lane's length. A lane longer than the loop shows its whole self with the un-played tail dimmed; a lane shorter than the loop shows the whole loop with the lane's values repeating inside it. The two numbers bottom-left are the loop and the lane, in that order.
Special values on Gate and Velocity
Two lanes have values beyond their normal ranges, and you reach them by pushing the value past the end with the usual hold-CONTROL-and-turn edit.
On the GATE lane, past the longest gate:
- Tie - extends the previous step's note across this step (holds the note over).
- Slide - legato overlap into the next step (no gap between notes).
On the VELOCITY lane, past either end:
- Accent - past the top; plays this step at full velocity.
- Mute - past the bottom; silences the step entirely.
The footer names the value as you reach it, so you always know which one you're on. There is no separate button or modifier to learn - the edit gesture simply keeps going past where the ordinary range stops.
Where patterns come from
Each lane has its own library: 32 factory patterns and 16 user slots. SUGGEST (EASY B1 on the melody screen) opens the pattern browser on them - FACTORY, USER and GENERATE on buttons 1-3, with APPLY and CANCEL to leave (Chapter 9).
Factory patterns are per-lane and musically specific - a pattern for PITCH is not the same shape as one for DELAY. The first pattern in every lane is its flat baseline, which is what CLEAR loads.
GENERATE is the procedural option: turn the CONTROL Knob to roll a new seed, press and turn it to set how far the result strays. The seed is a label for the random state, so noting one down means you can return to it.
Everything previews live - you hear each pattern on the lane as you land on it. CANCEL puts back what you had, and the whole browse is a single press of UNDO.
MORPH - transforming the lane
Press MORPH (ADVANCED B1 on the melody screen) to open the Morphing tools for the selected lane.
Morph is a three-stage transformation pipeline that reshapes the lane's values without editing individual steps. It's how you take a straight pattern and give it variance, non-destructively. You can scale and filter the sequence in ways that keep its original structure but generate variations on the same theme.
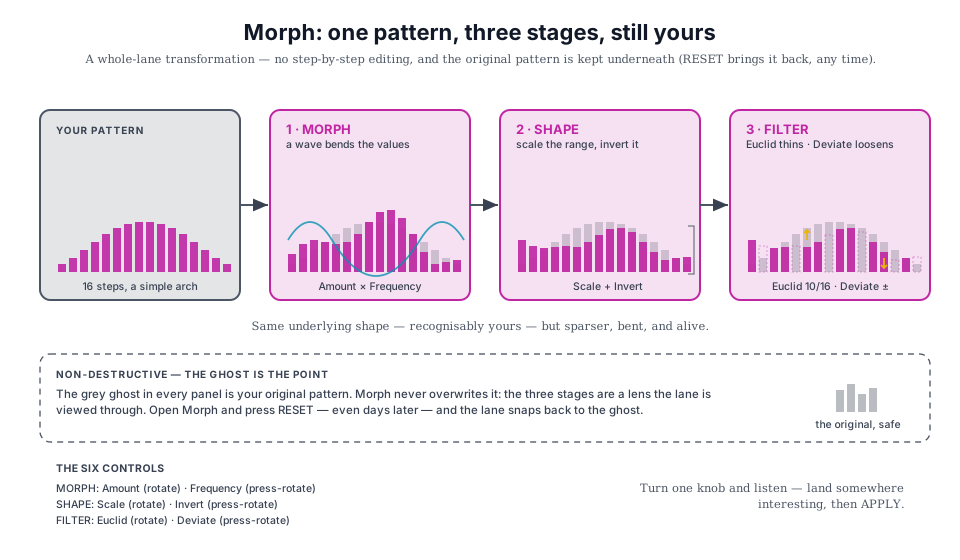
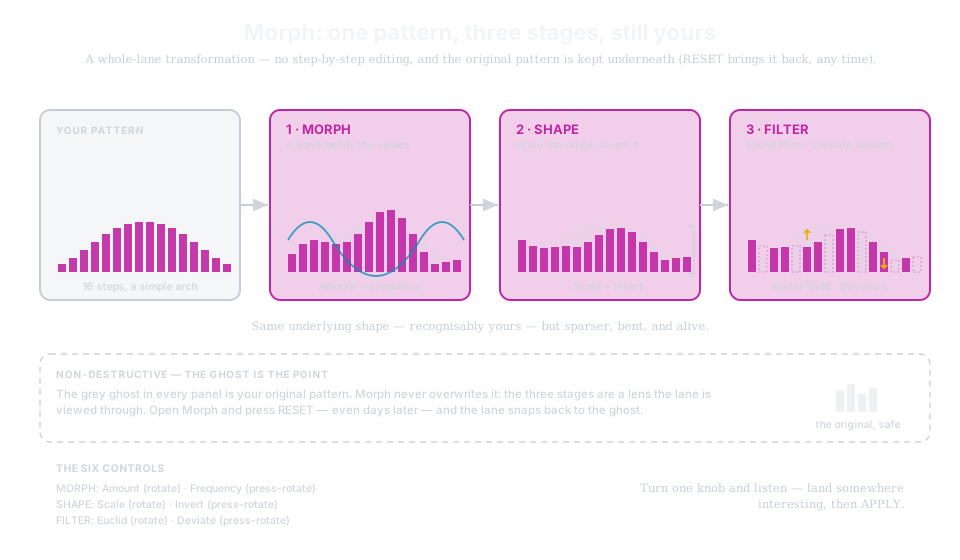
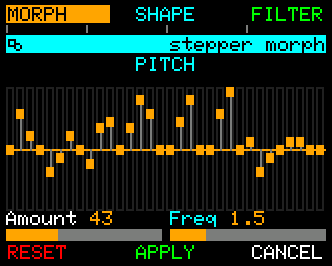
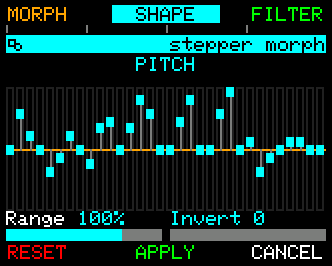
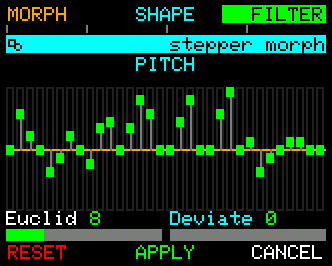
The three stages:
| MORPH | SHAPE | FILTER |
| RESET | APPLY | CANCEL |
Stage 1 - MORPH. A wave modulation applied to the base values. Two controls:
- Amount (CONTROL rotate) - how strongly the wave affects the values. 0 has no impact. Higher or lower amplifies the effect.
- Frequency (CONTROL press and rotate) - how many wave cycles fit into the pattern. Set to 1 for a slow rise-and-fall across the whole loop; set higher for a faster oscillation.
Stage 2 - SHAPE. Applies scaling and inversion to the morphed values:
- Scale (CONTROL rotate) - compresses or expands the range of values. Negative values invert the shape.
- Invert (CONTROL press and rotate) - folds the sequence in a specific direction. Reduces positive values all the way to equivalent negative values. Or in the opposite direction can make all negative values progressively more positive.
Stage 3 - FILTER. Two very different filter tricks:
- Euclid (CONTROL rotate) - an Euclidean rhythm filter. Sets how many steps in the 32-step pattern remain active; the rest are filtered out. Turn from 32 down toward 1 to sparsen a busy pattern.
- Deviate (CONTROL press and rotate) - adds controlled randomness to the values that were cut by the filter. Centre value is no randomness; extremes turn the pattern into something more free.
Each of the three stages has its own selector - MORPH, SHAPE, FILTER. Press one to switch to that stage's controls.
- RESET clears the current stage back to defaults;
- CONTROL + RESET resets all three stages.
- APPLY commits the morphed result to the lane;
- CANCEL discards.
Because Morph works on the lane as a whole, it's a fast way to explore variation without touching individual steps.
Set a pattern you like, then open Morph and turn the Amount knob - you'll hear the same underlying shape start to transform. Land somewhere interesting and APPLY.
NON-DESTRUCTIVE EDITS - You can remove the morph at any time by opening Morph and pressing RESET, even after leaving the Morph screen. The untouched pattern is kept underneath throughout.
SAVE - building your library
Press SAVE (ADVANCED B4 on the melody screen) to save the current lane to one of its 16 user slots.
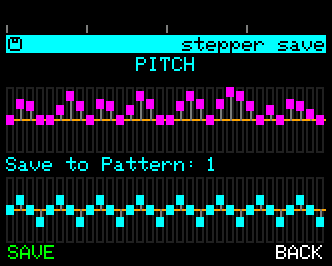
- Rotate the CONTROL Knob to pick a target slot.
- Press SAVE to enter confirmation
- then YES to commit - or CANCEL to back out.
The two-press confirm prevents you from accidentally overwriting a slot you meant to keep.
User slots are per-lane - PITCH patterns and GATE patterns are stored separately - leaving plenty of room for your personal library. You browse them under USER in SUGGEST's pattern browser.
The same lanes, elsewhere
The lane editor is shared with the Modulators: a Modulate slot set to the step-sequencer type gets its own lane, edited through LOAD / EDIT / MORPH / SAVE screens - see Chapter 12.
Worked Recipes - for the Lanes
The "build a groove from scratch" recipe. From Home: TRACKS → MELODY. Tap button 2 until it reads VELOCITY. Turn CONTROL to step 1, then hold CONTROL and turn up past the top for an ACCENT. Repeat on steps 5, 9 and 13 - a 4-on-the-floor. Tap button 2 to GATE and push steps 2 and 4 past the top for TIE. Tap to PITCH and walk through setting each step's degree. Three lanes, one screen, no APPLY anywhere.
The "just get me a pattern" recipe. Press SUGGEST and turn the CONTROL Knob - you're auditioning the current lane's library live. Land on one that fits and press APPLY. Repeat per lane. A fast way to seed a patch you'll then tweak by hand.
The "make it evolve" recipe. With a PITCH pattern in place, tap CONTROL for ADVANCED and press MORPH. Turn Amount up until the values start to drift; set Frequency to about 1 cycle per loop. Switch to SHAPE and invert around 30. Switch to FILTER and pull Euclid down to 24 to open up some space. APPLY. The pattern is recognisably yours but no longer static.
The "polyrhythm" recipe. On PITCH, tap CONTROL for ADVANCED and turn knob 2 (
step) to 5. Tap button 2 to GATE, set 7. To VELOCITY, set 3. The three lanes now cycle at 5, 7 and 3 against the track - patterns won't line up again for many bars, and the melody grows and reshapes as they drift.
What's next
If this chapter feels like a lot, focus first on PITCH, GATE and VELOCITY - that is where most of the music is. SLICE and DELAY are where groove lives. OCTAVE, CHANNEL and LAYERS are for arrangement tricks you'll reach for later.
Chapter 12 (Modulate) pairs beautifully with the lanes: a Modulate slot pointed at a lane's Morph Amount or Rotation will evolve that lane over time, turning a fixed pattern into a moving one without your ever having to touch it again.