Arp Behaviour Parameters

Mode
Each arpeggiator can operate independently in any of 4 modes: ARP, CHORD, PAD, or DRONE.
-
ARP Mode will play each note in the chord or scale sequentially one after the other. Imagine playing the notes in a chord one at a time on a piano. Works well with shorter GATE values.
-
CHORD Mode will play all notes in the chord or scale at the same time; in line with the STEPS parameter. Imagine playing a chord stab on a piano. The chord will repeat on every step, so can often work better with lower TIME DIVISION and medium GATE values.
-
PAD Mode, similar to chord Mode, will play all notes in a chord or scale, but will not release the note until the Note or Chord is changed. Imagine playing and holding a piano chord with sustain. It works well with longer GATE values or synthesizer pad sounds that play indefinitely.
-
DRONE Mode is similar to PAD mode but as the chord/scale is changed, any notes that belong to both the current chord and the new chord will be held. This creates a drone effect that keeps notes playing longer. E.g. If you change from a C major chord to E Minor, the E and G notes will be sustained and only the C will be replaced by B.
Rhythm
Press the Rhythm button to toggle between Rhythm Pattern and Rhythm Length parameters.
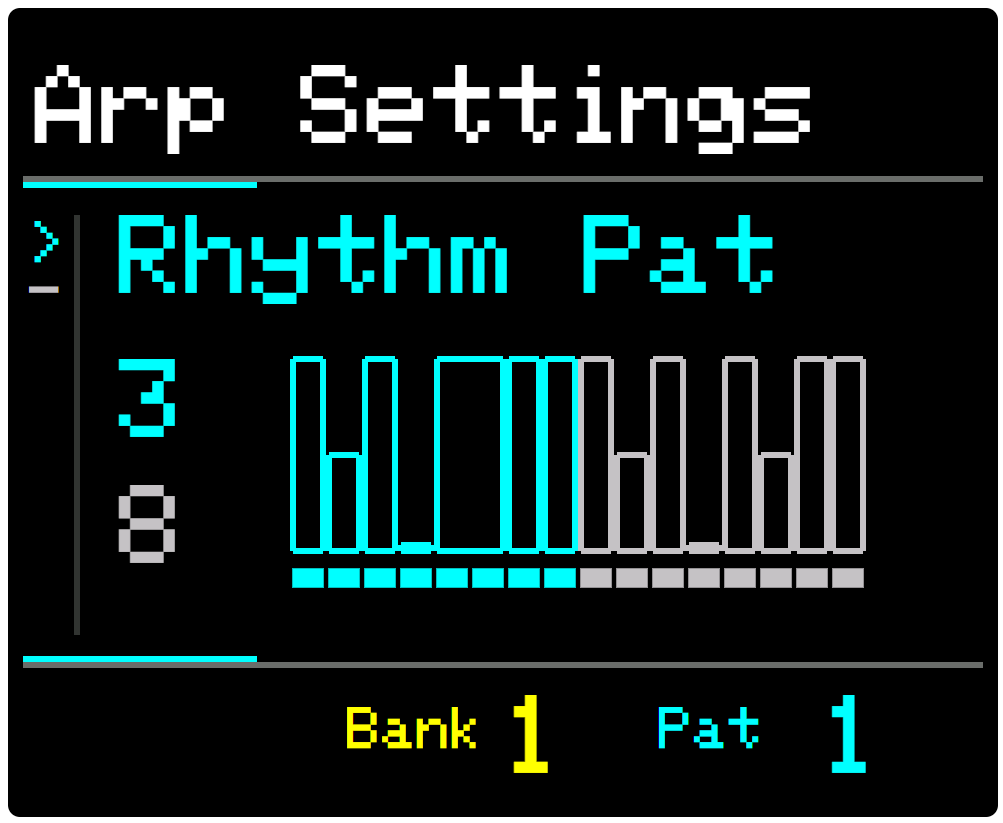
Rhythm Pattern
Enables the creation of 16-step patterns that modify the velocity and gate of individual notes in a sequence.
Rhythm Patterns, using ties, mutes and accents, can add movement to your sequence.
There are 16 default patterns to select, each of which can be edited.
Rhythm Length
Allows control of the length of the pattern and therefore how often the pattern repeats.
Note that the pattern repeats independently of the sequence (i.e. number of steps). Thus, a pattern and sequence of different lengths will move in and out of phase, creating interesting effects.
Editing Rhythm Patterns
With either Pattern or Length highlighted, press the Program button (KNOB control) to enter Edit Mode.
The pattern display will change colour with the first step in the sequence highlighted.
Rotate the KNOB control to change the selected step.
Use the Up & Down buttons to change the velocity of the highlighted step.
To create Tied Steps: Press the UP button until the step reaches maximum velocity and press again to tie the step to the one previous, thus allowing you to create longer notes in the sequence.
To create Muted Steps: Press the DOWN button until the step reaches the minimum velocity, this will mute the step and the midi note will not be played for this step.
Note that the maximum velocity is controlled by the Velocity setting of the selected arp. Therefore, to create Accent Steps, set the Velocity setting quite high, then edit the Rhythm Pattern, setting most steps to a mid-level value with individual peak steps at a higher velocity.

Groove
Press the Groove button to toggle between the Groove Pattern and Length parameters.
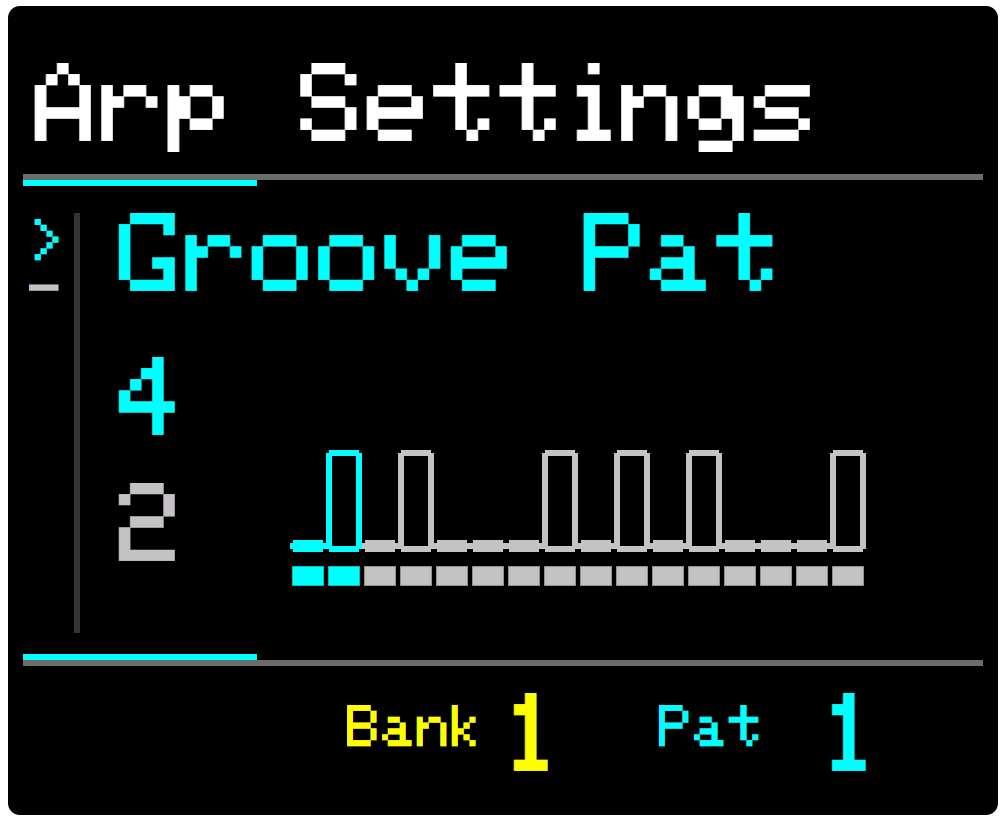
Groove Pattern
The groove parameters let you create up to 16 step patterns that affect the timing of notes (similar to Delay), by offsetting individual notes in the sequence. From swing effects to drunken sounds, Grooves can add feeling.
There are 16 default patterns to choose from, all of which can be edited.
Tips. It’s easy to create random-sounding sequences with groove patterns, but they always repeat. Try using lower values to create swing-style effects. Use higher values to create different rhythmic patterns.
Groove Length
Groove Length allows you to set the length of the pattern and how often the pattern repeats.
Groove Patterns repeat independently of the sequence length (i.e. number of steps). Changing a pattern to a different length from the sequence length can create interesting phasing effects.
Editing Groove Patterns
With either Pattern or Length highlighted, press the Program button (KNOB control) to enter Edit Mode.
The pattern display will change colour with the first step in the sequence highlighted.
Rotate the KNOB control to change the selected step.
Use the Up & Down buttons to change the timing delay of the highlighted step.
Note: Groove values are added to the Delay value when calculating note timing. Therefore, shifting the arp Delay will also shift the Groove pattern by the same amount, keeping the note timing in sync.


Saving and Resetting Patterns
Press the Reset button when in Edit Mode to clear a Rhythm or Groove pattern back to a simple default pattern.
Edited patterns are saved automatically and are global to all patches within each bank. Editing a pattern with any arp or patch selected will change the pattern for any other arps or patches in the same bank. Therefore, it is recommended to use different patterns for each patch.
FX
The FX parameter is a powerful tool to create variation and interest in your arp sequences.
It utilizes a repeating pseudo-random sequence to modify a parameter value by a different value for each step of the sequence.
Think of it as a reproducible randomizer.
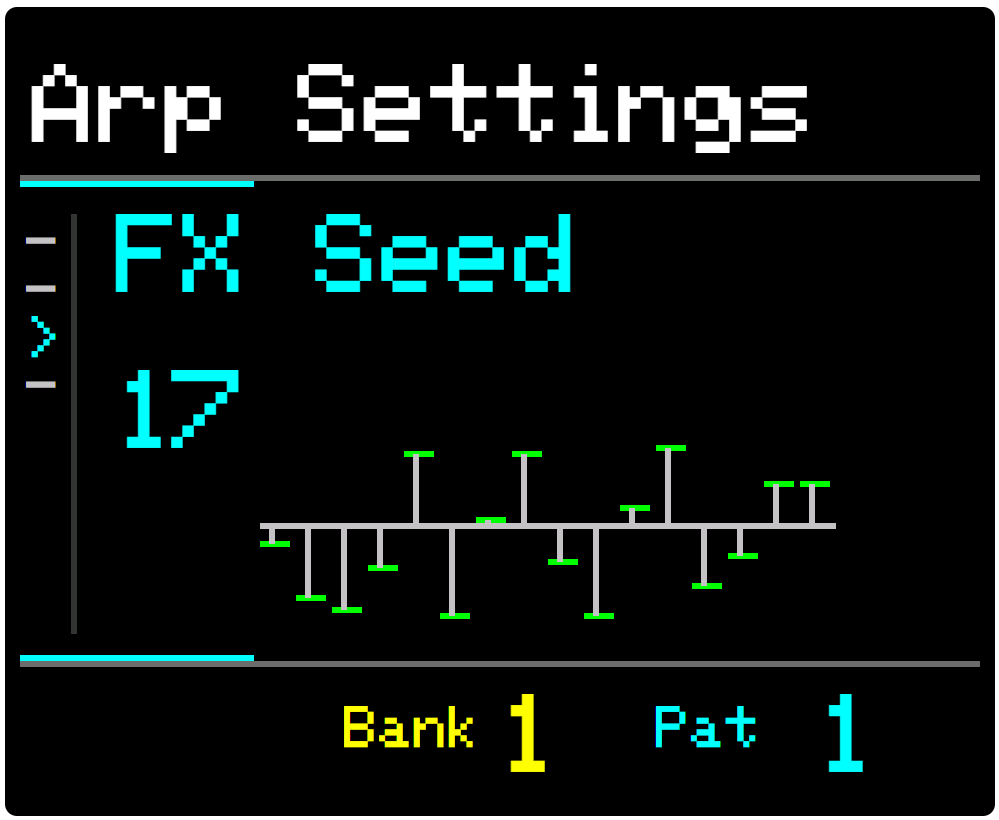
In SET Mode, press the FX button to show the effects menu. There are 6 controls:
-
Amount
-
Controls how much the target parameter is affected by.
-
0 to 100%
-
-
-
Target
-
Determines the parameter that is affected by the FX sequence.
-
Velocity, Octave, Note Offset, Time Division, Step Offset, Direction, Bounce, Repeat, Delay, Chop, Ratchet, MIDI Channel, Gate
-
-
-
Seed
-
Sets the seed value for the sequence to be applied. (The first 16 steps are visualized in the display)
-
1-127
-
-
-
Repeat
-
Determines how often the sequence will repeat.
-
¼ bar to 256 bars
-
-
Pre Mod
-
The length of time, with no modulation, before the modulation starts.
-
¼ bar to 256 bars
-
-
See Modulation Cycle
-
-
Post Mod
-
The length of time, with no modulation, after the modulation ends
-
¼ bar to 256 bars
-
-
See Modulation Cycle
-
FX can be used creatively in many ways and the possibilities are extensive.

Modulation
Modulation can be used to evolve individual arp sequences over time, returning to the starting point based on the rate.
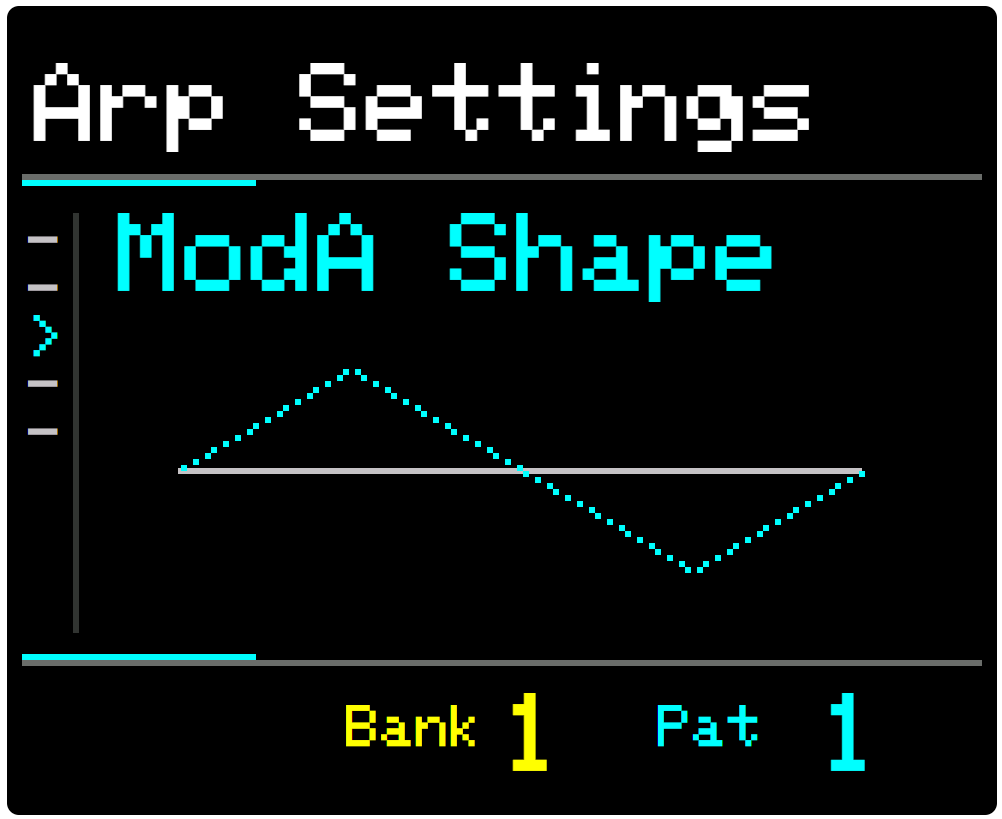
There are 2 modulations per arp: Mod A and Mod B.
Press the SET button, then Chord 5 to edit Mod A (or Chord 6 for Mod B)
Press the Chord button again to cycle through the Parameters:
-
Amount
-
Controls how much the target parameter is affected by.
-
0 to 200%
-
-
-
Target
-
Determines the parameter that is affected by the modulation.
-
Almost all parameters can be targeted (there are too many to list here).
-
-
-
Shape
-
The wave shape of the modulation applied over time.
-
Sine, Square, Triangle, Saw
-
Plus, equivalent Half and Inverted Shapes
-
-
-
Rate
-
The wavelength. How often the modulation repeats
-
1 tick to 256 bars
-
-
-
Pre Mod
-
The length of time, with no modulation, before the modulation starts.
-
¼ bar to 256 bars
-
-
See Modulation Cycle
-
-
Post Mod
-
The length of time, with no modulation, after the modulation ends
-
¼ bar to 256 bars
-
-
See Modulation Cycle
-
-
Toggle
-
Enables or disables the modulation
-
On, Off
-
-
On pressing play, the modulation will start from the currently stored value of the selected parameter.
For list parameters like direction and bounce, the modulation will cycle through the parameter options in the same order they appear when editing that parameter.
If the modulation takes the value of the parameter beyond its minimum or maximum value it will hold at that value until the modulation brings it back within its valid range.
Combining 2 Modulations allows huge scope for creativity.
Using 2 modulations of different rates can greatly extend the length of the sequence pattern, up to many minutes. Modulating all 4 arps and setting them to follow can produce hours of evolving patterns.
Doing this can cause the sequence to appear random, but remember that there is no such thing as random and it will always return to the start.
For more detailed information about Modulation, please refer to Appendix IX - How Does Modulation Work

MIDI Out
Sets the midi channel on which the individual arpeggiator will output.
Voice Mode
Also under the MIDI Out parameter, Voice Mode sets how the MIDI note output should behave.
-
Poly Mode
-
By default, ARP respects the gate times of every note. This creates layered notes during playback and relies on the external instrument to control how it handles polyphony.
-
-
Mono Mode
-
ARP will stop all notes on the current midi channel before sending new notes. This supports monophonic instruments that cannot handle polyphonic note input or behave erratically (which sometimes is no bad thing).
-
Note that Mono mode is per MIDI channel, so you can still layer notes using up to 4 separate monophonic instruments.
As an alternative to Mono Mode, try setting the gate value to 1.
Experiment with gate times to see how your mono instrument behaves; the results can be pretty interesting.
CC Output
Introduction
ARP has the ability to output automated MIDI CC (Control Change) messages as a continuous modulation (LFO).
This is controlled by 2 parameters under the MIDI OUT button:-
-
CC Number (Off, 0 to 127)
-
The Control Number of the CC message
-
-
CC Value (0 to 127)
If CC Number is Off, MIDI CC Output is disabled for the selected track and no messages will be sent.
The MIDI Output Channel for all CC Messages is set using Menu >> CC Output Channel
When CC Value is assigned to a modulator, the modulated CC Value will be emitted as a continuous output (up to 50 times per second).
This can be used to change external sounds over time by assigning the CC Output to any control or parameter on your Synth, Groovebox, VST, DAW.
It’s like automating a MIDI controller knob.
It means that ARP has 4 automatable MIDI CC outputs that work independently of the ARP’s MIDI Note output.

How to configure
In Set Mode,
-
Press the MIDI OUT button until CC Number is shown
-
Select the desired Control number, using the UP/DOWN buttons or KNOB control.
-
Press the MIDI OUT button again to select CC Value is shown
-
Set the baseline value for the output using the UP/DOWN buttons or KNOB control.
Assign to a modulator
-
Press MOD A or MOD B and set the Target to CC Value.
If CC Value is the target of multiple modulators, the output value will be the sum of the modulation.
Assigning CC to your device
You can assign the CC output to an external control (such as filter cutoff on your synthesizer) in one of two ways.
If your external device has a defined like of CC Assignments, simply set the CC Number as defined in your device’s documentation.
If using a Device, DAW or VST that has a CC Learn function, you need ARP to output only the MIDI CC message and no other messages. (Pressing PLAY may output 4 CC Numbers simultaneously, which will confuse the device.)
Therefore, ARP provides a solution…
-
In Set Mode, Select either MIDI Out, CC Number of CC Value
-
Press the Program button (Tempo Knob)
This will emit a single MIDI CC message with the baseline CC Value.
Disabling note output
If you don't want note data (sent alongside CC), simply mute the track. Alternatively, you can set Velocity to zero.